
Step 1: Submitting the Direct Routing Order Form
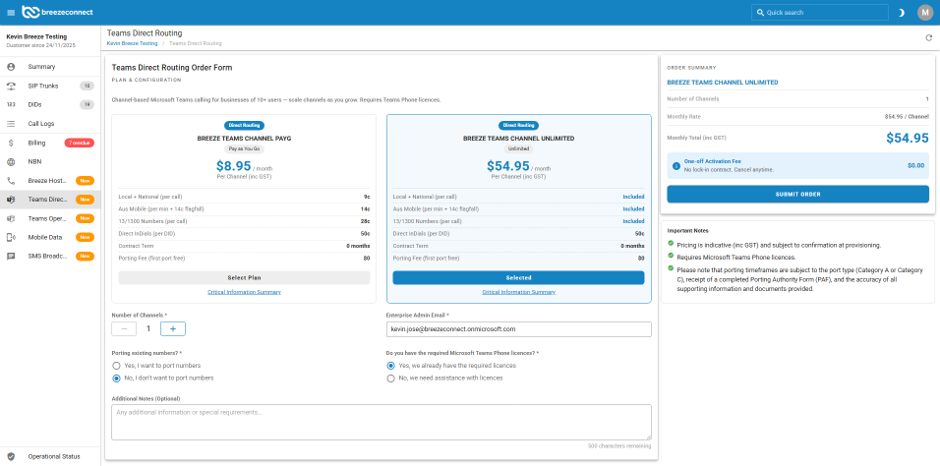
The setup process begins on the Partner Portal by submitting a Direct Routing order form. Follow these key steps to complete your submission:
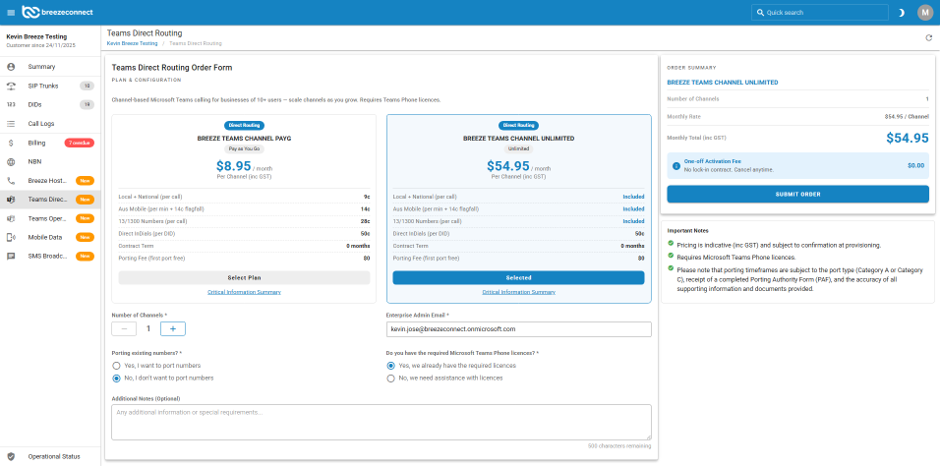
Select Channel Type & Quantity: Choose between PAYG (Pay-As-You-Go) or Unlimited (ULTD) channels and specify the total number of channels required.
Number Porting: Check the porting box if you need to transfer existing phone numbers to the service.
Teams License Verification: Confirm whether the client holds a valid M365 & Teams Phone Standard license.
Global Administrator Email (Crucial for Setup): You must enter the Global Administrator email of the client's M365 tenant, not a Teams-only administrator. A Global Admin account is strictly required for the initial integration and setup part.
(Note: Once direct routing is fully completed, you can use a Teams Administrator to manage and assign trunks and phone numbers on the Connect to Teams portal).
Advanced/Complex Routing Note:
If your client requires complex or advanced routing setups, such as using PAYG for inbound calls and Unlimited for outbound calls, you can request this by mentioning it in the additional notes field on the order form. Our team will reach out with more information, discuss potential pricing savings, outline any limitations of that setup, and obtain your final confirmation before proceeding.
Step 2: Order Confirmation & Integration Portal Emails
Once submitted, our team will process your order and send two confirmations within a few hours:
1. Order Confirmation Email: Confirms the direct routing process has officially started.
2. Registration Email: Sent directly to the M365 tenant's Global Administrator email (entered by the partner in the order form) from the ConnectToTeams integration portal, bridging the tenant with our voice trunks.
Step 3: Completing the Integration & Portal Configuration
Many partners miss the detailed steps in the registration email, so please follow this walkthrough carefully:
3.1 Initial Authentication
Click the  button in the registration email to link your Breeze Connect Teams connector to the Microsoft Office 365 tenant.
Log in using your Office 365 Global Administrator credentials.
License Reminder: Ensure the tenant has an available Teams Phone Standard add-on with an E1/E3 base license, an E5 license (which includes the add-on), or an equivalent valid license.
Permission Pop-ups: During this authentication process, you will encounter two permission request pop-ups. You must accept both of these prompts using the Global Admin account to allow the connector integration to proceed.
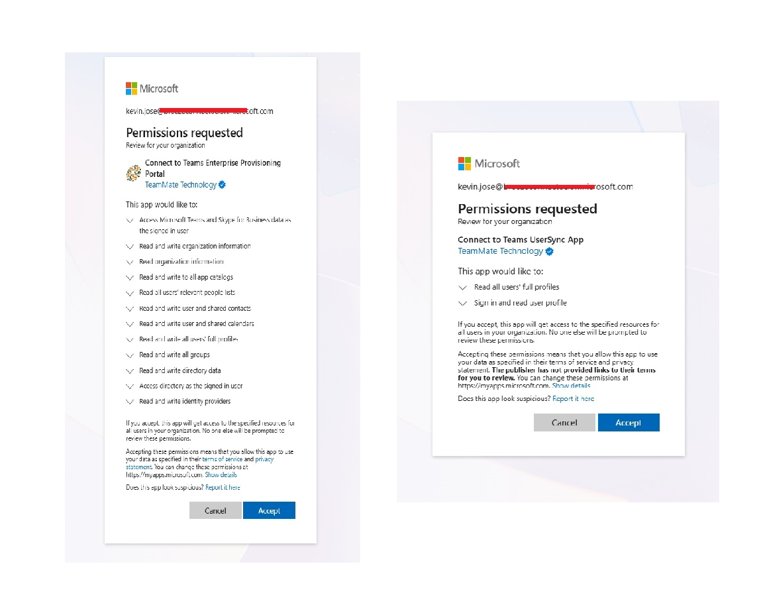
Important Note on Licenses:
To successfully complete the direct routing configuration steps, you must have both a valid M365 base license (E1, E3, or equivalent) and a Teams Phone Standard license available and unassigned on the tenant. If these licenses are currently in use, you can temporarily unassign them from a user for a few minutes while you complete the direct routing registration and then reassign them back to the user once the process is finished.
Group Selection & Sync: Once you have accepted the permissions, you will be taken to the Connect to Teams portal. Here, you can select and confirm specific groups in the M365 tenant that need to be set up with Teams calling.
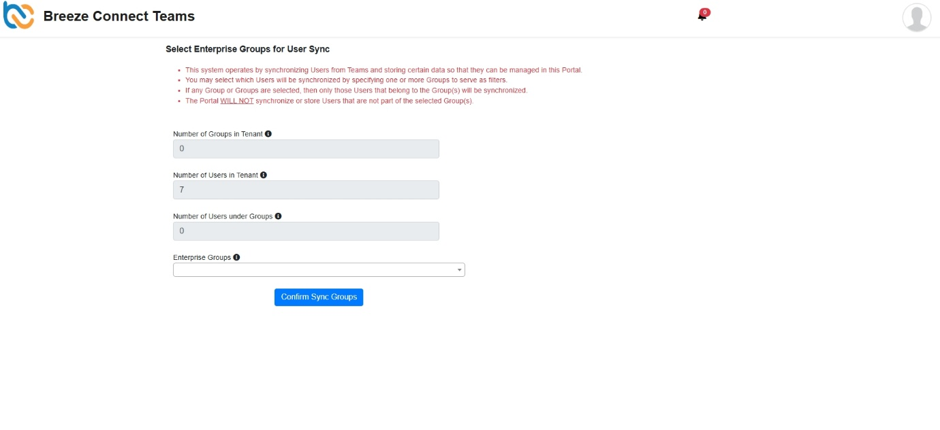
Note: If you do not make a specific selection here, all users from the tenant will be synced to the portal by default.
3.2 Navigating the Dashboard
After completing the acceptance process, you will land on the integration dashboard.
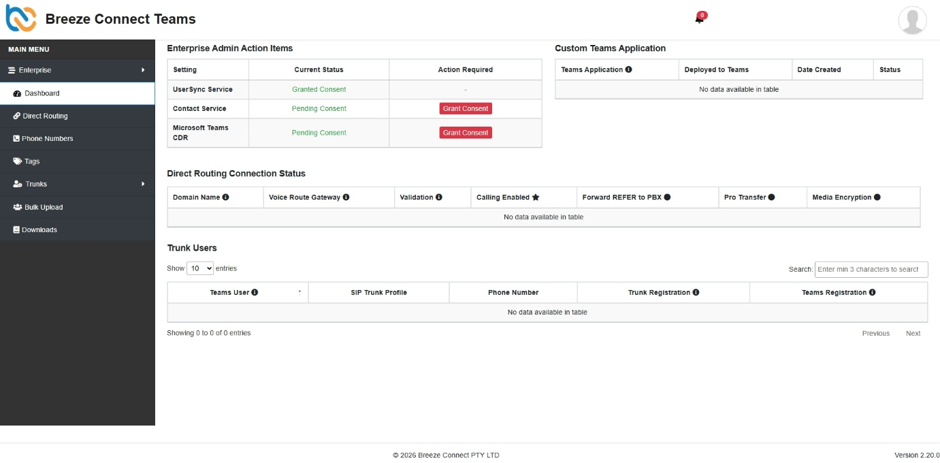
Accessing the Dashboard Later: If you are unable to access the dashboard directly via the email link, or if you need to return to the portal after completing the direct routing setup, you can log in directly at: enterprise.connecttoteams.com
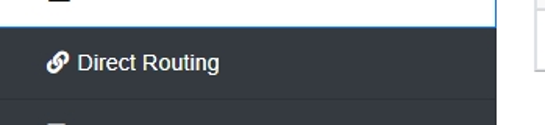
Navigate to the Direct Routing page via the left-hand menu.
Select AU East as the gateway for the direct routing setup.
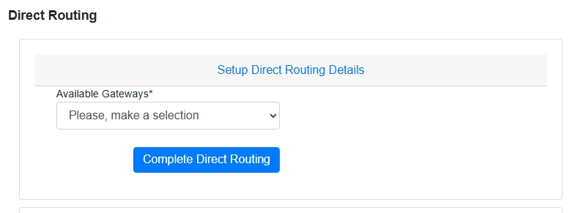
Troubleshooting Tip: If the dashboard fails to load properly, return to the registration email and click the Complete button again. If you encounter an "Invalid Credentials" notice, simply click Sign In, log in with the Global Admin account, and repeat the Direct Routing step above.
3.3 Wizard & License Verification
The setup wizard will automatically search for and verify the required Teams Phone Standard license. Wait for the wizard to confirm it is active.
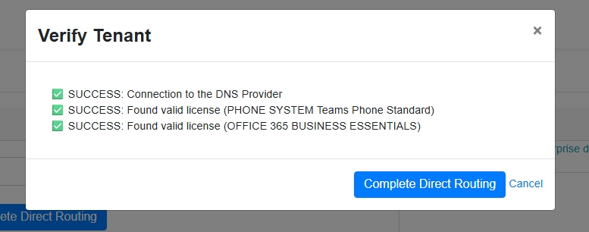
Once active, click Complete Direct Routing.
Please be patient Background processing can take 15 minutes or more.
Once completed, you can navigate back to the dashboard to view your status, as shown below:
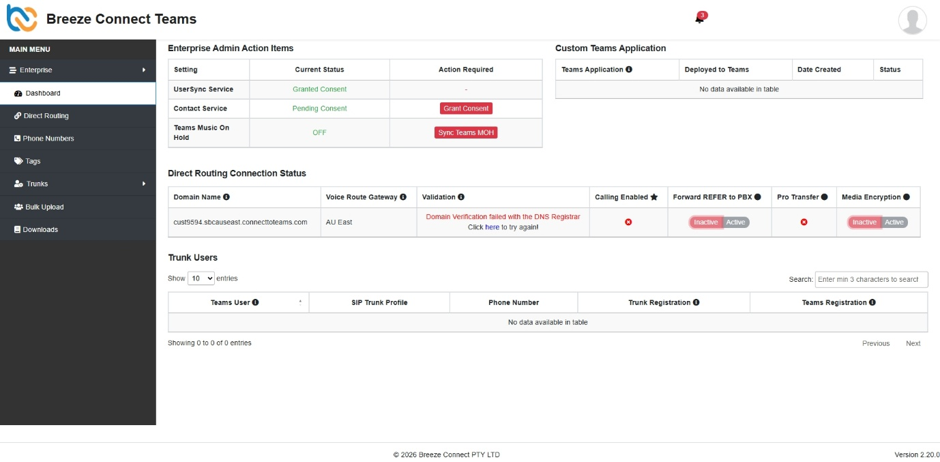
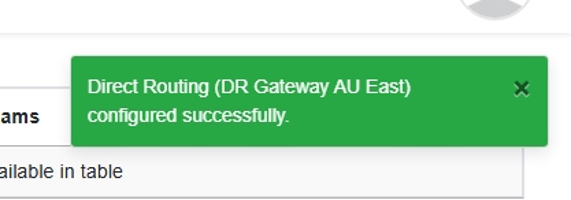
Success Notification: When the direct routing has completed successfully, you will receive a notification in the top right corner stating that Direct Routing configured successfully.
Note: If the step fails, navigate back to the Direct Routing page and select Finish to retry.
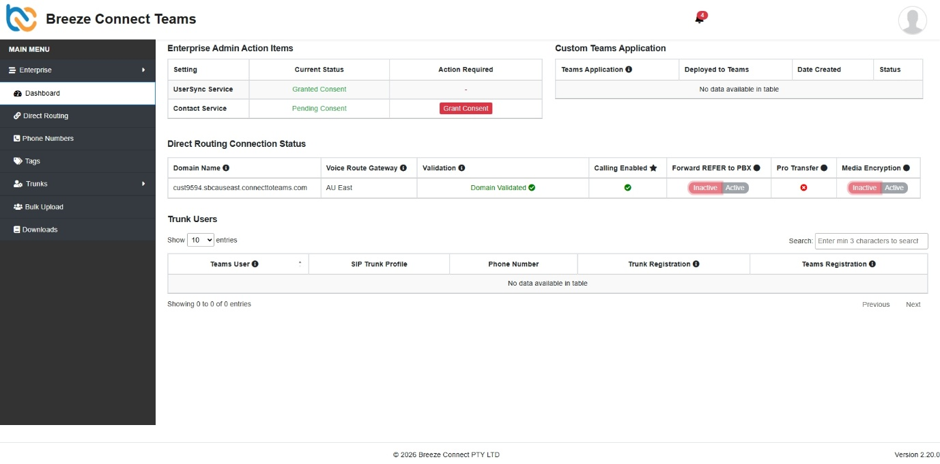
Verify Domain & Calling: After receiving the success notification, head back to the main dashboard to verify that your domain has been successfully validated and that calling has been enabled, as shown in the image below.
(Optional Check): If you check the Office 365 admin console during this process, you will notice an automatically created system user with the assigned spare licenses.

Releasing Licenses & Keeping the User: Once the direct routing user has been created and you have confirmed that the domain has been validated and calling has been enabled on the dashboard, you can safely unassign the Teams and M365 licenses from that direct routing user.
CRITICAL WARNING: Never remove or delete the direct routing user from the tenant. This user account is what maintains the active integration link between your Teams tenant and our servers.
Teams Admin Center Verification: You can also navigate to your Teams Admin Center > Voice > Direct Routing, click on Voice routes, and view the new voice route automatically created by the wizard, as shown in the screenshot below.
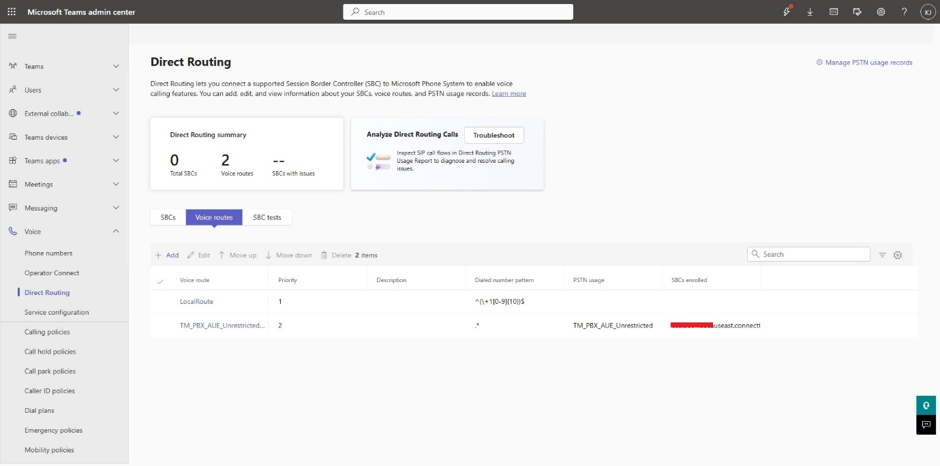
CRITICAL WARNING: Make sure you do not remove or modify this voice route either.
Step 4: Notifying Us & Trunk Provisioning
Once the dashboard displays a successful completion message:
Note: If you check the trunk profile or phone numbers sections in your dashboard right now, they will appear empty.
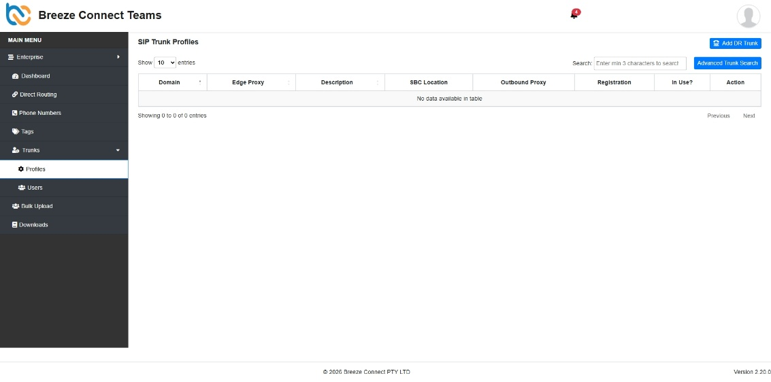
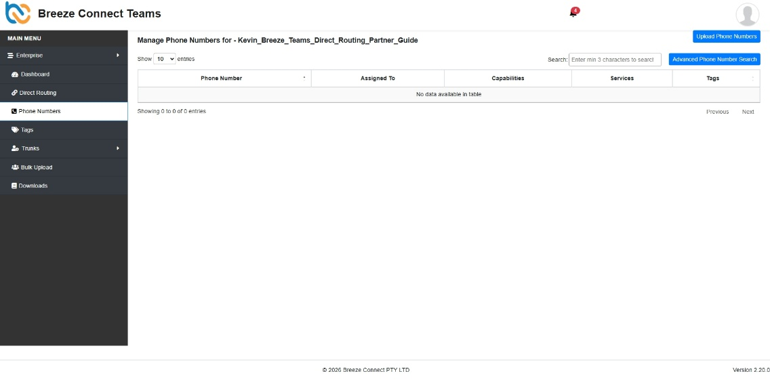
Once all of the above setup steps, verifications, and checks have been successfully completed:
Please let us know by emailing help@breezeconnect.com.au (or by replying directly to your existing order ticket).
Once notified, our team will take over to perform the next steps on our end.
2. Trunk Setup: Upon receiving your confirmation, we will register the required trunk(s) for your client.
3. Final Configuration: Once our side is complete, you can follow the Configuring Trunk & Assigning Numbers on Direct Routing to upload phone numbers, configure your trunks, and assign numbers to your users.
Support & Assistance
If you get stuck at any point during these steps, our support team is here to help:
Call us anytime at 08 7078 5300 to speak directly with our team who can assist you through the process or reply directly to your ongoing order ticket.